쿠버네티스에서 BookStack 설치하기
July 2023 (1032 Words, 6 Minutes)
BookStack 설치하기
도입부
쿠버네티스에서 Docs를 관리하기위해 Bookstack을 설치해보기로 했습니다.
ArgoCD를 조금 더 구체적으로 이용해
helm 형태로 배포를 해보려고 bookstack의 백그라운드로 돌아가는 DB, 그리고 bookstack의 컴포넌트들을 배포하려고 테스트를 하던 중, 의존성과 변수 설정이 꽤 복잡해 그냥 일반 helm chart를 찾아 배포하는 것으로 방향을 변경했습니다.
(helm 형태의 배포는 기존 jekyll 블로그를 변경 해보는 것으로 결론을 도출했습니다)
Chart 선정
항상 helm chart들을 보다보면, 어떤 chart로 설치해야할지 고민이 참 많이됩니다.
그래도 조금이나마 star가 조금이라도 더 있는 chart을 기준으로 설치해보려합니다.
bookstack 5.1.2 · k8s-at-home/k8s-at-home
해당 Chart을 이용하기로했고, 다른 chart들을 봐도 readme가 작성조차 안되어있는 차트들도 많았습니다.
해당 chart에서 readme를 전부다 읽어보아도 상세하게 custom 할 수 있는 방법은 거의 보이지않아 직접 custom value를 작성해보는 과정을 다루겠습니다.
이미지 버젼 결
조금 아쉬운건 해당 chart version이 5.1.2버젼이 마지막인데, 컴포넌트들이 크게 바뀌지 않았을거라 생각하여 image tag만 최신버젼으로 수정해 배포를 하겠습니다.
deafult values항목을 열어보면, 별도의 value를 설정해주지않을때의 value들이 설정되어있습니다.
image:
  # -- image repository
  repository: ghcr.io/linuxserver/bookstack
  # -- image tag
  pullPolicy: IfNotPresent
  # -- image pull policy
  tag: version-v21.12
현재 21.12 버젼을 사용중인데, 최신버젼을 조회해보면 23버젼까지 나온것을 확인 할 수 있습니다.
해당 문서에서 stable 버젼으로 release 된 것 중 최신버젼은 v23.06-ls88 로 확인되네요
image:
  tag: v23.06-ls88
Ingress
여러가지 자료들을 찾아봐도, 쿠버네티스에서 ingress를 이용해 접속하는방법이 상세하게 나와있지 않습니다
ingress:
  # -- Enable and configure ingress settings for the chart under this key.
  # @default -- See values.yaml
  main:
    enabled: false
그래도 해당 deafult values에서는 기본 chart가 참조하고있는 repo 주소를 확인해보라고 하네요
library-charts/charts/stable/common/values.yaml at main · k8s-at-home/library-charts
해당 디렉토리로 이동해 values.yaml 파일을 봅니다.
# -- Configure the ingresses for the chart here.
# Additional ingresses can be added by adding a dictionary key similar to the 'main' ingress.
# @default -- See below
ingress:
  main:
    # -- Enables or disables the ingress
    enabled: false

    # -- Make this the primary ingress (used in probes, notes, etc...).
    # If there is more than 1 ingress, make sure that only 1 ingress is marked as primary.
    primary: true

    # -- Override the name suffix that is used for this ingress.
    nameOverride:

    # -- Provide additional annotations which may be required.
    annotations: {}
      # kubernetes.io/ingress.class: nginx
      # kubernetes.io/tls-acme: "true"

    # -- Provide additional labels which may be required.
    labels: {}

    # -- Set the ingressClass that is used for this ingress.
    # Requires Kubernetes >=1.19
    ingressClassName:  # "nginx"

    ## Configure the hosts for the ingress
    hosts:
      -  # -- Host address. Helm template can be passed.
        host: chart-example.local
        ## Configure the paths for the host
        paths:
          -  # -- Path.  Helm template can be passed.
            path: /
            # -- Ignored if not kubeVersion >= 1.14-0
            pathType: Prefix
            service:
              # -- Overrides the service name reference for this path
              name:
              # -- Overrides the service port reference for this path
              port:

    # -- Configure TLS for the ingress. Both secretName and hosts can process a Helm template.
    tls: []
    #  - secretName: chart-example-tls
    #    hosts:
    #      - chart-example.local
해당 양식에 맞게 ingress파일을 작성해줍니다.
저는 ingress nginx controller를 사용중이며, ingressclass은 nginx을 사용중입니다.
별도로 cert-manager를 이용해 ssl을 사용중이기 때문에 annotation에 별도로 cluster issuer를 넣어주어야 합니다.
해당 양식에 맞게 모두 작성하고나면 다음과 같은 양식으로 완성을 했습니다
ingress:
  main:
    enabled: true
    annotations:
      cert-manager.io/cluster-issuer: "letsencrypt-issuer"
    ingressClassName: "nginx"
    hosts:
      - host: bookstack.mont-kim.com
        paths:
          - path: /
            pathType: Prefix
            backend:
              service:
                name: bookstack
                port:
                  number: 80
    tls:
      - hosts:
          - bookstack.mont-kim.com
        secretName: bookstack-tls
ENV
이렇게 수정한 ingress로 접속이 가능해지는데, 실제로 서비스를 띄워보면 해당 도메인으로 접속은 되지만, 바로 리다이렉팅 되는 주소는 private/public IP로 변환이 되더라고요.
조금 더 검색해본결과 env에서 기본적으로 도메인을 설정해줘야 도메인 기반으로 리다이렉팅하는 설정이 있었습니다.
env:
  DB_HOST: bookstack-mariadb
  DB_USER: bookstack
  DB_PASS: bookstack
  DB_DATABASE: bookstack
  APP_URL: https://bookstack.mont-kim.com
Volume
이제 작성한 리소스들의 볼륨을 설정해야합니다.
# -- Configure persistence settings for the chart under this key.
# @default -- See values.yaml
persistence: {}
  # config:
  #   enabled: false
  #   mountPath: /config
기존에 시놀로지 스토리지에 nfs 기반으로 storageclass를 생성했기때문에 다음과 같은 코드를 작성했습니다
persistence:
  config:
    enabled: true
    mountPath: /config
    storageClass: nfs-client
Database
기존에 helm을 이용하지않고도 bookstack은 별도의 db를 참조하여 데이터를 저장하는 구조를 갖고있었습니다.
mysql 및 mariadb를 모두 이용 할 수 있는 상태이며, 해당 helm chart에서는 mariadb를 사용하고있었습니다.
# -- Enable and configure mariadb database subchart under this key.
#    For more options see [mariadb chart documentation](https://github.com/bitnami/charts/tree/master/bitnami/mariadb).
# @default -- See values.yaml
mariadb:
  enabled: false
  architecture: standalone
  auth:
    database: bookstack
    username: bookstack
    password: bookstack
  primary:
    persistence:
      enabled: false
근데 이 mariadb section은 위에 참조하던 bookstack의 helm git주소를 참조하는것이 아니고 bitnami의 mariadb helm repo를 참조하고있었습니다.
charts/bitnami/mariadb at main · bitnami/charts
상세하게 수정이 필요하다면, 해당 문서를 참조해 파일을 수정 할 수 있습니다.
DB가 올라오면서 문제가 있었는데, 설정 문제라고 예상을 했었는데, helm install / uninstall을 해도 지워지지않고 남아있던 DB의 PVC에서 문제가 발생했던 것이였네요.
mariadb:
  enabled: true

  auth:
    rootPassword: bookstack
    database: bookstack
    username: bookstack
    password: bookstack
  primary:
    persistence:
      enabled: true
실제로 작성한 코드는 mariadb, persistence만 true로만 고쳐서 기본적으로 mariadb가 생성되게 한것 외에는 기본 템플릿과 큰 차이가 없습니다.
이제 helm doc에서 권장하는 대로 helm repo add와 install을 진행합니다.
helm repo add k8s-at-home https://k8s-at-home.com/charts/
helm install my-bookstack k8s-at-home/bookstack --version 5.1.2
명령어는 다음과 같습니다.
다만 install 명령어보다는 upgrade —install 명령어가 개인적으로 더 친숙합니다. 기존에 한번 작성했던 파일도 덮어쓸수있기때문에 install보다 훨씬 용이한 명령어입니다.
파라미터로 custom values 파일을 지정해주고, namespace까지 지정하는 명령어로 수정을 하면 다음과 같습니다
helm upgrade --install bookstack k8s-at-home/bookstack --version 5.1.2 -f cvalues.yaml -n bookstack
해당 명령어들을 모두 수행하고 나면, 정상적으로 웹 접속이 가능해집니다.
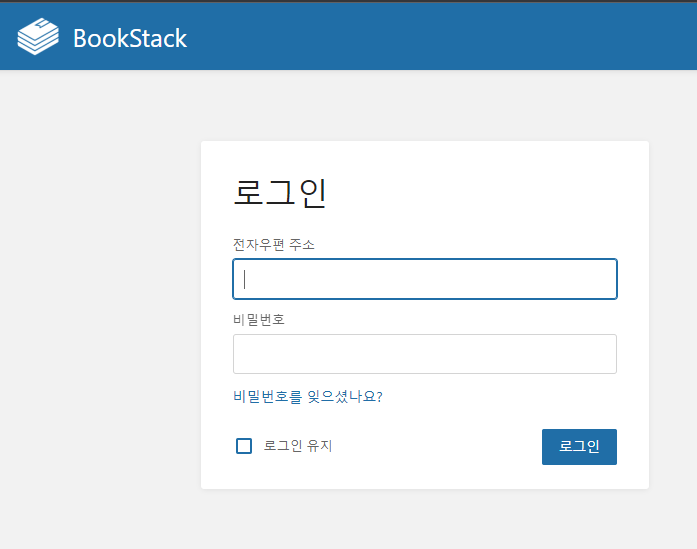
default ID/PW는 admin@admin.com / password 입니다

이후엔 정상적으로 로그인하신 화면을 볼 수 있습니다.
이상으로 bookstack 설치기를 마무리하겠습니다.
읽어주셔서 감사합니다.